
28 Aug How We Sealed Our Driveway – DIY Success Story
Sealing a blacktop driveway might sound like a big job, but with a little prep and the right approach, it turned out to be one of the easiest and most rewarding home projects we’ve tackled. Not only does a fresh sealcoat make the driveway look brand new, but it also protects the surface from weather, water, and wear. Here’s how we did it, step by step, and why we’ll definitely be doing it ourselves again.
Step 1: Prep Work Makes All the Difference
A good seal job starts with a clean surface. A couple of days before we started, we power washed the entire driveway to remove dirt, debris, and any residue. The night before sealing, we blew it off with a blower so the surface was perfectly clean and dry.
Since our driveway has Belgian block running along the edges, we also picked up a wallpaper brush to edge neatly without getting sealer on the stone. That little detail made a huge difference in the final look.
Step 2: Calculating How Much Sealer We Needed
Before buying materials, we measured the square footage of the driveway and divided it by 350 sq. ft. per pail (a standard coverage guideline). This driveway needed:
– 8 pails for the first coat
– 5 pails for the second coat
That calculation kept us from running short in the middle of the job.
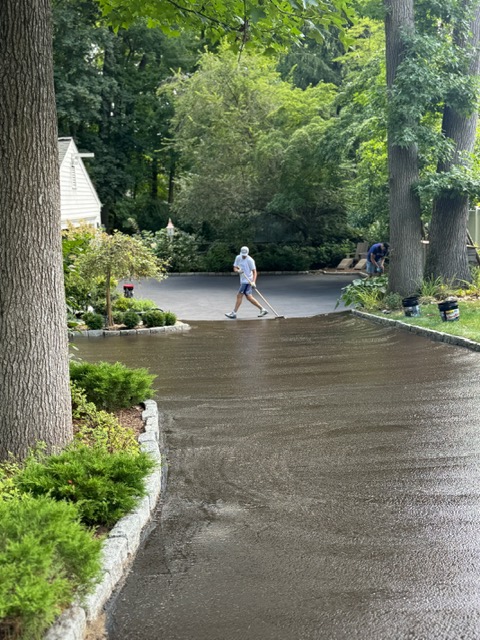
Step 3: Applying the First Coat
On sealing day, we started at the high end of the driveway near the street and worked our way back toward the house. Using a squeegee, we applied steady down pressure, taking about half a blade’s width with each pass for an even finish.
To save time, we spaced the pails behind us as we worked. The first coat went on smoothly and only took about an hour and a half. We were even able to walk on it later that afternoon.
Step 4: The Second Coat
The next morning, we repeated the process with 5 pails for the second coat. With the base already sealed, this coat went even faster—just about an hour from start to finish. Again, it was dry enough to walk on by the afternoon, but since parts of our driveway are shaded, we waited a couple of days before parking cars on it.
The Results: Big Savings and Big Curb Appeal
The difference was incredible. The driveway looked like new, and the whole project cost us just $375 in materials from The Home Depot. For comparison, a contractor had quoted us $1,500 for one coat—and we got two coats for a fraction of the price.
The best part? Our neighbors loved it. Several came over to ask about the process and said they’re planning to seal their driveways too.
Final Thoughts
If you’re on the fence about sealing your own driveway, don’t be. With some basic prep, a squeegee, and a few pails of sealer, it’s a straightforward project that saves you money and boosts your curb appeal instantly. All in all, this was a very easy DIY project—and the results speak for themselves.
